

Ahem. Or a pop-up edu-video. Here’s one we made earlier!

And yes, we were inspired by the late great VH-1 Classic series.
*sigh* Let’s take a moment…
And move on:
The pop-up video mechanism is great for videos that are longer than four minutes, such as presentations or student-led conferences, because it gives you the chance to provide additional context that’s not readily discernible from the video alone.
Here’s the basic recipe:
- You make your pop-up resources in Keynote;
- Add them to your video using the green screen utility;
- Then add your opener, closer and chapter pop-ups.
Let’s unpack that process, step by step.
To make your life a little easier, we’ve prepared a package of resources files that you can download directly, referenced by filename in this tutorial.
Download the files here (.zip format).
The download should begin automatically. When it’s finished, expand the .zip file package on your machine. It’s a directory containing five files:
- in-video pop-up creator.key (Keynote file)
- Pop Up chapter creator.key (Keynote file)
- Jaunty POP noise.wav (uncompressed audio file)
- Pop Up eduvideo Intro.mp4 (compressed video file)
- spare water footage.mp4 (compressed video file)
We created and are distributing these files as fair use for creating educational materials. The audio and the water footage are pieces in the public domain. But still: don’t be a weasel.
Let’s make your eduvideo pop up resources:
Chapter pop-ups
Chapter pop-ups are questions that take up the entire screen and are meant for the viewer to view *while the video itself is not playing*. Think of them as pre-test and post-test questions. In our example at the top of the post (video), chapter pop-ups appear at 4:36, 11:34, 14:01, 16:15, and 19:39. That’s a lot, but to be fair, this is a 20-minute video, and we really wanted viewers to stay focused (and not check their twitter).
Pop Up chapter creator.key is the file you’ll use to create all your chapter pop-ups. Open it up in Keynote, and here’s your default screen:
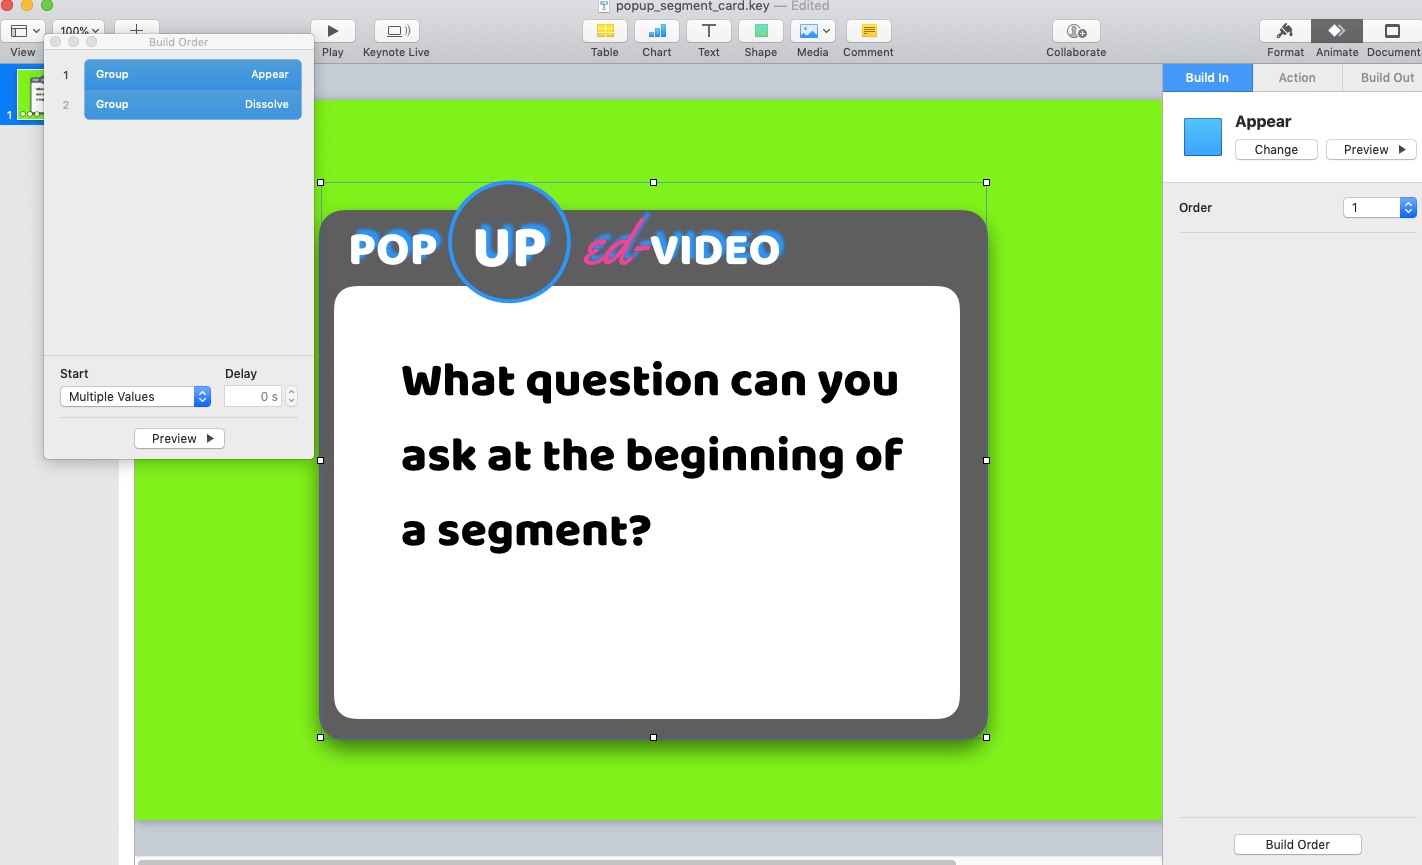
Doubleclick on the black text and you can edit it to customize your question. Boom: done.
Now, once you’ve edited your text, export your Keynote file to a movie. Go up to the top menus: File > Export to > Movie…
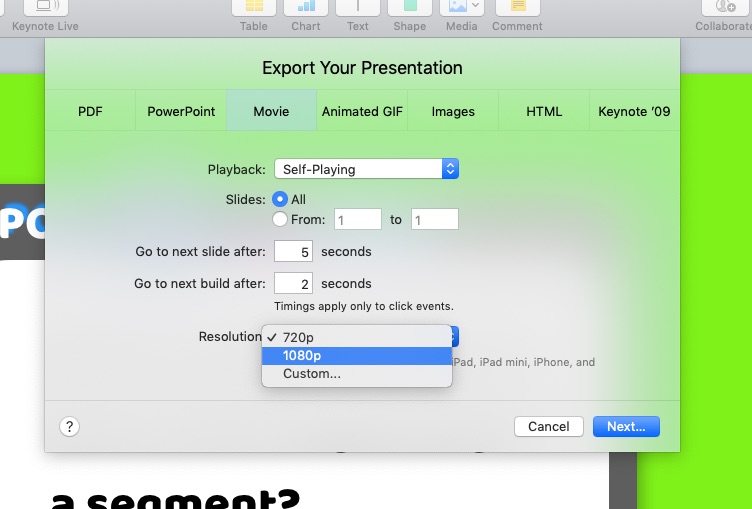
Change the resolution to 1080p and you’re good to go. This generates a .m4a movie file. Save your new chapter pop-up movie in a central directory for when we get to Add your resources. Make as many chapter segments as you feel makes sense.
In-video pop-ups
Open up your in-video Pop Up Creator.key file in Keynote. Here’s your default screen:
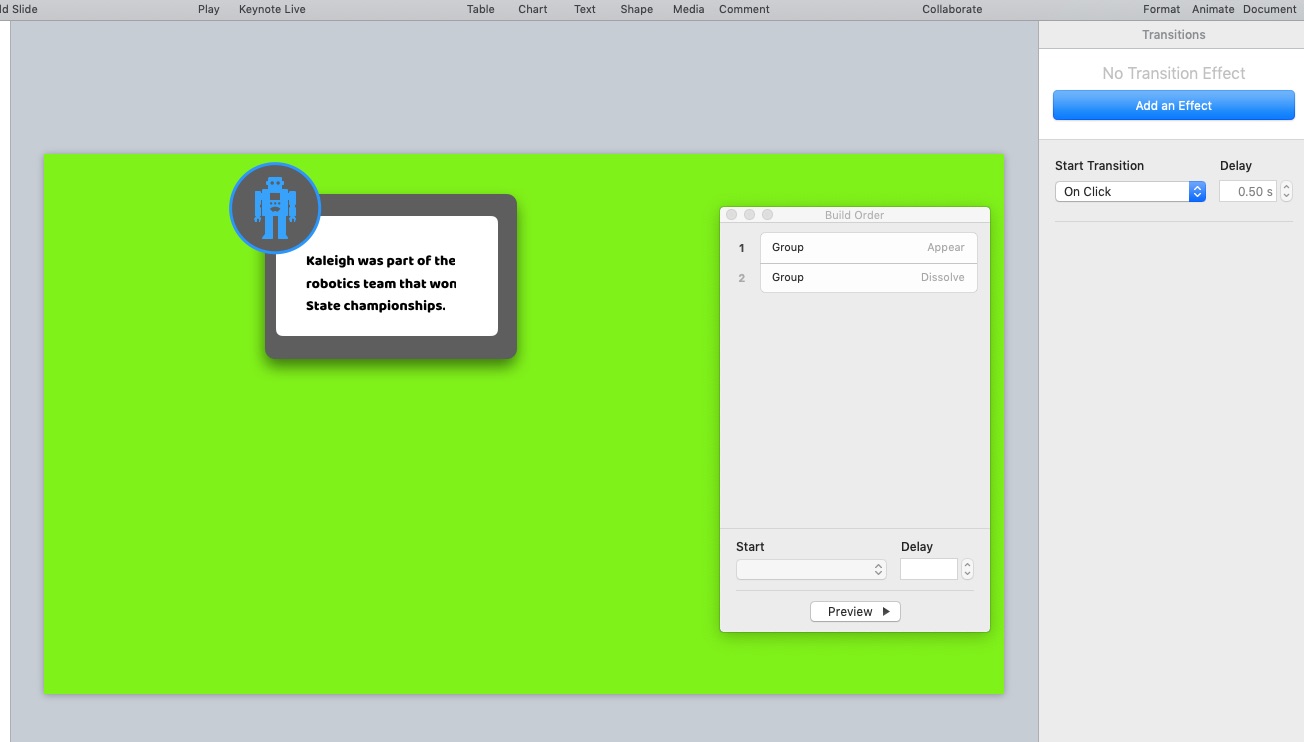
Edit the black text in the box by clicking on it.
Don’t add more than 12 words to any one pop-up. If you’ve got that much to say, it can be two screens. You want to keep your pop-ups informative but sparse. Remember: you’re asking the viewer to take their attention away from the content of the video to pay attention to the pop-up, so make it worth their while and respect their time.
After you’ve edited the text, choose an image to represent the main idea of the text.
Keynote has a great on-board library of art. Say our text is: “Kayleigh was part of the robotics team that won State championships.” Click on the Shape button at the top of your Keynote screen. This opens up the Keynote images library. Start searching on “robot”, for example.
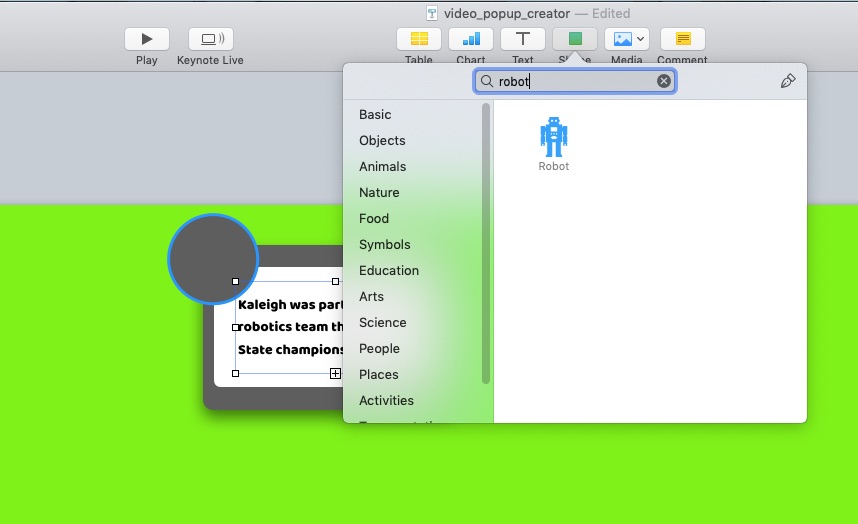
Click once on the icon you’d like to add, and Keynote will automatically add it to your screen. Move the icon to the center of your circle. Resize it as appropriate.
Next, select all the items in your pop-up. Then go up to your file menus at the top of your screen, to Arrange > Group. This will make Keynote treat your pop-up box as one discrete item and make your life simpler by a factor of ten, because now you add animation.
With your pop-up box highlighted, choose Animate from the righthand menu.
You need a Build In and a Build Out animation, and a duration.
- Under “Build In”, choose Appear.
- Under “Build Out”, choose Dissolve.
Then you’re going to determine your duration.
Click the Build Order button at the bottom of the righthand Animate mention. In your Build Order, you’re going to line them up, one on top of the other, then add a delay to the Build Out of at least 1.0 seconds.
Your Build In is linked up with your Build Out when they are touching (Appear is in light, Dissolve is in dark).
Click once on the Dissolve bar in your Build Order window. It brings up a dialogue for Start and Delay. Your Dissolve bar should have a Start of “After Build 1” and your Delay is at least 1.0 seconds.
Here’s a quick screencast of that process:
Save your file. Now you export it as a movie. File > Export to > Movie…
Change your resolution to 1080p and click Next…
Save your file. It will have a .m4a file ending. Now let’s put all this together in a video.
Add your resources
We’ll work in iMovie for this example but this works in whatever video editing program you’re using. Let’s add your pop-ups to the video itself.
Here’s the layout of a pop-up eduvideo:
Opener | Chapter Pop-up | Video — with in-video pop-ups | Closer
Opener:
Add it in the first slot on your timeline.
Chapter Pop-up:
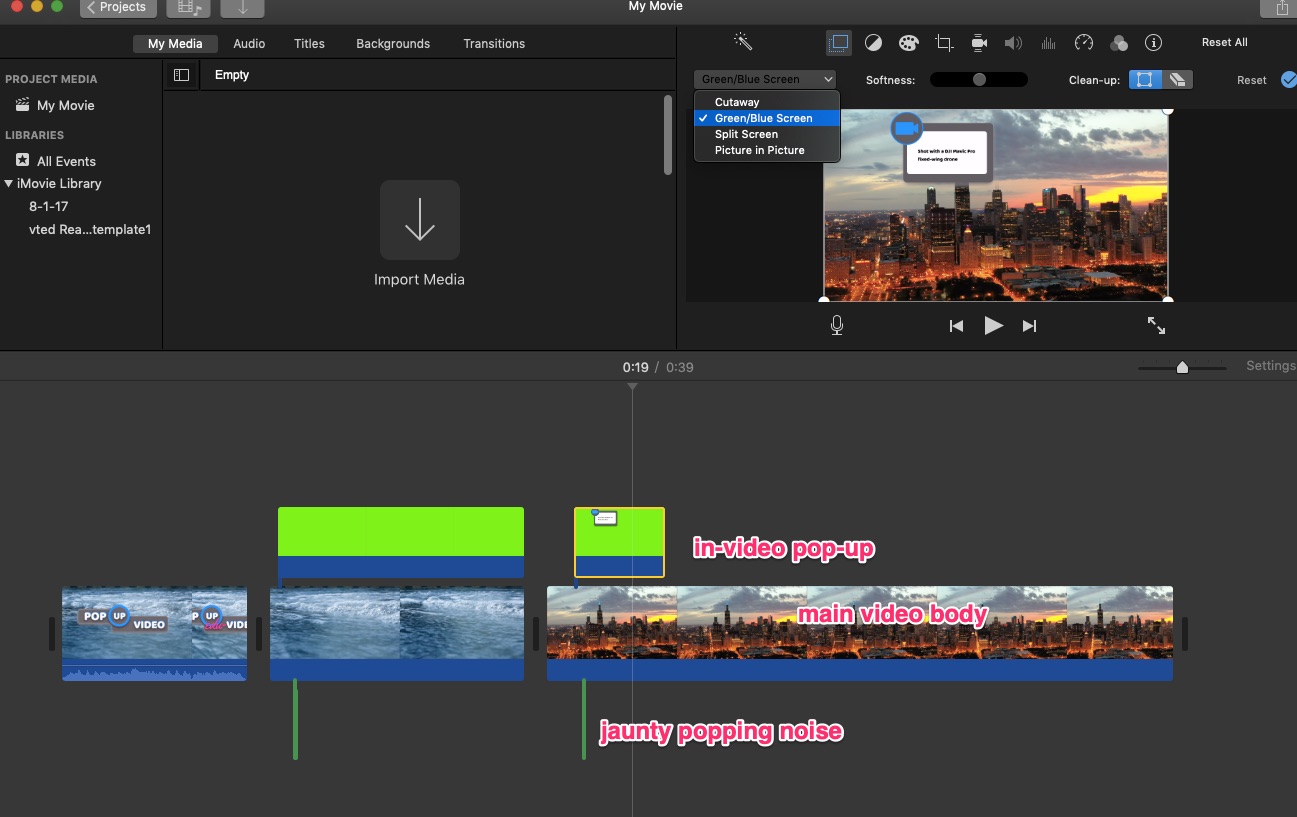
With the spare water footage highlighted in your timeline, add your chapter file *on top of it*.
Highlight this new giant green block, and change “Cutaway” to “Green/Blue Screen” from the menu on top of your viewer.
Then add the Jaunty Popping Noise *underneath* your timeline.

You’ll need to move it around to get the timing right, so that as your question appears, the pop happens, but have fun with it.
Adding in-video pop-ups
Next, choose the points at which you’d like to add a pop-up message during your video. You’ll use the same method you used for adding the chapter pop-up, but add your in-video pop-up directly to the footage.
Say we have some lovely drone footage of the Chicago skyline. And we’d like to add a notation about the make and model of the drone used.
- Make your drone info pop-up in Keynote, and export the animation as a movie.
- Import that movie into iMovie
- Add it to your timeline above the skyline footage
- Change the Cutaway effect to Green/Blue Screen
- Add your Jaunty Pop sound to your timeline below the skyline footage
- Adjust the timing of your pop-up notation and your pop noise.
BOOM.
Closer: …is totally up to you. We didn’t include a closer in our downloads package. Our example video ends with a chapter segment post-question that covers the whole video, but what you end your video with is entirely up to you. Have fun with it, reinforce your message — just go hog wild.
And let us know how this worked for you! We would love to see your pop-up eduvideos! Leave us a comment and share!
Thanks for sharing. I read many of your blog posts, cool, your blog is very good.