Tag Archives: digital storytelling

Get started podcasting with students

New to podcasts?  Listen to a few!

Before you jump into creating a podcast, get familiar with the format.  Here are a few that are friendly for middle school students and their teachers:

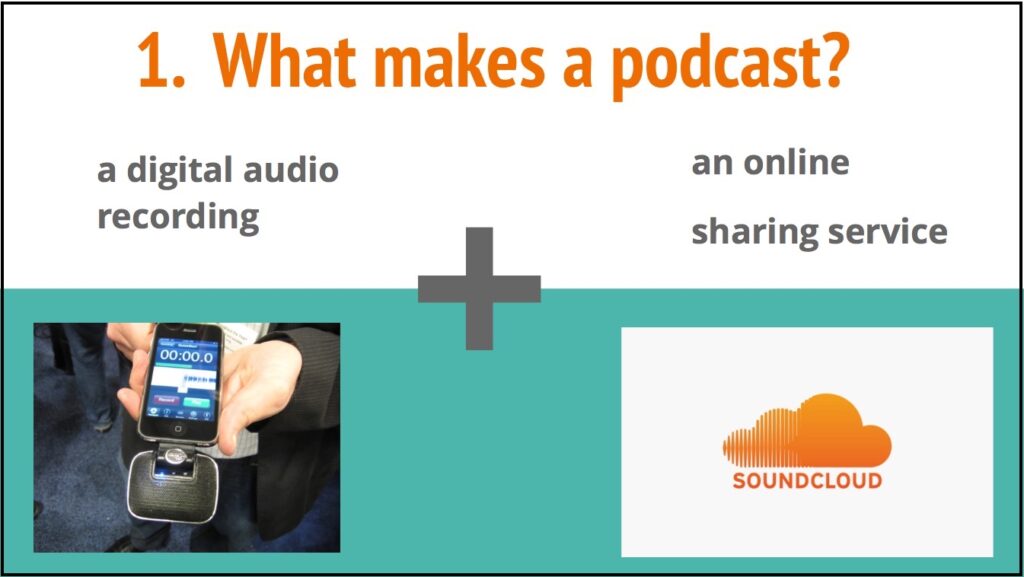
What is a podcast anyway?

Podcasting takes the best of a classic medium — radio — and puts that power in the palm of your hand. And in the palm of your neighbor’s hand. Heck, everyone’s hands. Podcasting makes great conversations, research, and storytelling available in an on-demand, on-the-go format that fits well into busy lives. All you’ve gotta do is tell a story, get it on tape, put it online, and share it with others.

Podcasting how to:

In realistic busy teaching terms, let’s look at how to get started podcasting with students by planning, recording, editing and sharing a podcast.

What makes a podcast? A digital recording and an online sharing service


1. Planning

First off, figure out why you and your students want a podcast. What’s the payoff? What stories are y’all trying to tell, and why is podcasting the perfect fit for them?

Different stories require different structures, and thus different ways of planning.  Here are some examples:

Podcasts in one voice:

Stories like a This I Believe essay, a book review, or a narrative require a script.  Students will want to draft and revise their story, starting with a hook to really capture their audience.  These types of podcasts often start with an introduction to the host and a conclusion thanking the audience for listening.

Interviews and Conversations:

StoryCorps is a great example of an interview or conversation style podcast.  These types of podcasts require some thought about the questions you will ask.  Students will want to draft some questions, but they’ll also want to practice follow-up questions.

Podcasts in many voices:

Podcasts like Dorothy’s List use many voices to tell a story.  These require both a lot of planning and the flexibility to incorporate the words and ideas of others.  Students will want to script portions of the podcast that introduce guests and their ideas and summarize and synthesize their words.  They will also want to have great questions and prompts for those they interview.  This format will require a lot of editing!

No matter the format, remember these questions:

NPR offers a plethora of resources for teachers and students, including the Teaching Podcasting: A Curriculum Guide for Educators.  In it, they share these questions for focusing student stories:

What is my story’s driving question?

What is the story NOT about?

How will I ensure my story is fair to the people and ideas it represents?

How will I engage my audience — and hold them?

What are my dream ingredients?

What will the audience remember when it’s over?

There is also a guide for students, perfect for self-directed learners!

Overwhelmed?  Start Small!

If this all seems like too much planning to start with.  Start with a very small class podcast like one of these:

  • Tell some jokes!  Here is your hook:
    • Voice 1: Knock, knock
    • Voice 2: Who’s there?
    • Back to Voice 1: (name)
    • Back to Voice 2: and (name) with the Knock Knock Cast where we tell three laugh, or groan, worthy knock knock jokes.
    • [Gather jokes from students and teachers]
  • The Wish Cast:
    • Hook: What would you do if you caught a fish who offered you a wish in exchange for its freedom?  This is (name) and (name) with the Wish Cast.
    • Content:  In Kate Messner’s book The Seventh Wish, Charlie Brennan is ice fishing when she catches a magic fish.  She can hardly believe it but thinks it might be worth it just to make a wish for the fun of it.  “Let Roberto Sullivan fall in love with me,” she tells the fish. The wish doesn’t work out the way she had hoped… but she gets more chances to make wishes. And what about you?  What would you wish for?  We asked some friends and this is what they said:
    • [Interview several people in the room: What would you wish for?]

2. Recording

There are a ton of ways to record your podcasts, depending on the equipment you have on hand.  Here are a few:

  • The Voice Memos app is available on all iPad, iPod, and iPhones and is an easy way to record audio. Unfortunately, this app does not allow for editing.
  • Audacity is free software for any computer that allows you to record and edit audio.
  • GarageBand is available for MAC and IOS devices and provides recording and editing capabilities.
  • Soundrap is an online audio recorder and editor, making it a great choice for Chromebooks.

While software and apps are always changing, you can find some basic step by step instructions and pros and cons of each application here.

All hail the podbox, baby

Because classrooms can be a little noisy at times, and it can be challenging to find a quiet space to record, we recommend trying out a podbox. This snazzy device is modeled on the type of mobile sound-dampening enclosures used by professional voice-over artists and designed by our very own Mark Olofson.

3. Editing and mixing

Once students have recorded their audio, they’ll find they need to edit it to make it sound great.  Here is a step by step process for producing a podcast.

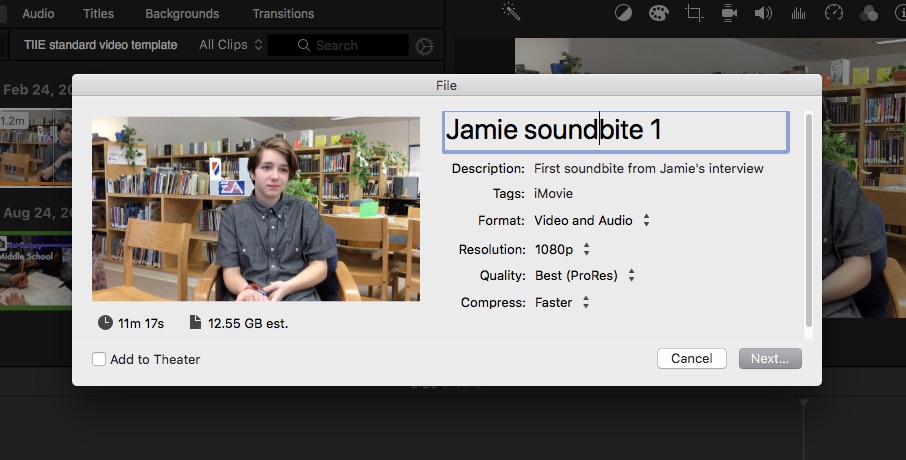
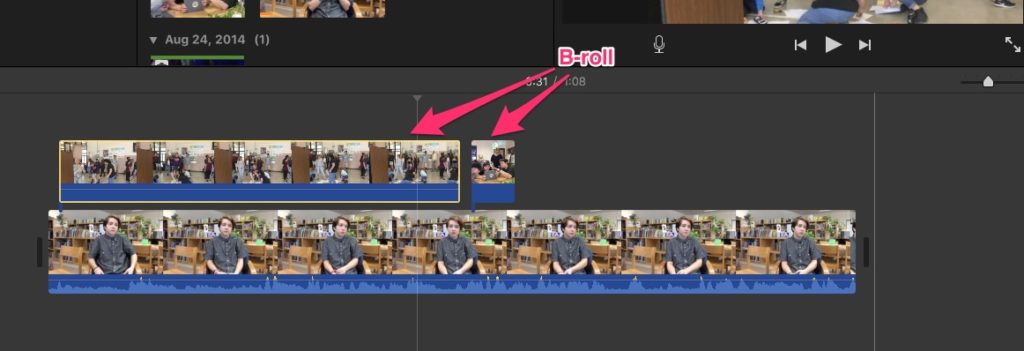
  • Cut your clips: select the audio you want to use and cut out the stuff you don’t want.
  • Order your clips: put your clips in order to tell your story.
  • Check your sound: are some clips too loud?  Are others to quiet?  Adjust the volume on your clips so that they are relatively uniform and won’t be too hard to listen to.
  • Add some sound: sound effects and music can make a podcast even better.  If there is time, add these in to help tell the story.

Some students may master this process quickly, for more advanced mixing check out NPR’s Producers Handbook to Mixing Audio Stories.

4. Sharing

Once you’ve begun creating finished episodes, it’s time to release them out into this big beautiful world of ours. Which begs the age-old question: how?

Send it out online

At the most basic, a podcast is a series of audio episodes you make available online. Soundcloud allows you to upload 180 minutes of audio for free. PodBean also provides free podcast hosting.

Once you have your podcast uploaded to an online service, you can share it with the world via social media, email, QR code, or adding it to your website.  Be sure to use multiple formats so it can find an authentic audience, otherwise, what is the point?!

Send it out over the airwaves

Brattleboro, Vermont was incorporated back in 1753, a former military fort that embraced trading, commerce and the power of nearby Whetstone Falls to spur mill production. It’s been home to countless tiny, fascinating episodes of Vermont history — episodes that current residents now listen to each week on the radio, being described and re-enacted by students from Brattleboro Area Middle School.

These students partner with the Brattleboro Historical Society in researching and recording 3-4 minute long episodes. And local radio station WKVT airs those episodes weekly. The community’s response to the episodes has been astounding, and the series is closing in on its 200th episode. Partnering with a resource-rich organization like a historical society provides a rich stream of content and expert knowledge. And approaching your local community radio station with educational content actually helps stations stay on the air, by partially fulfilling the terms of their FCC licenses.

Additional resources:

Podcasts with and by Vermont students

Have you tried podcasting with students? What tips can you recommend?

Getting started with cooking videos

A recipe for video-making proficiency

"Video in the Classroom"
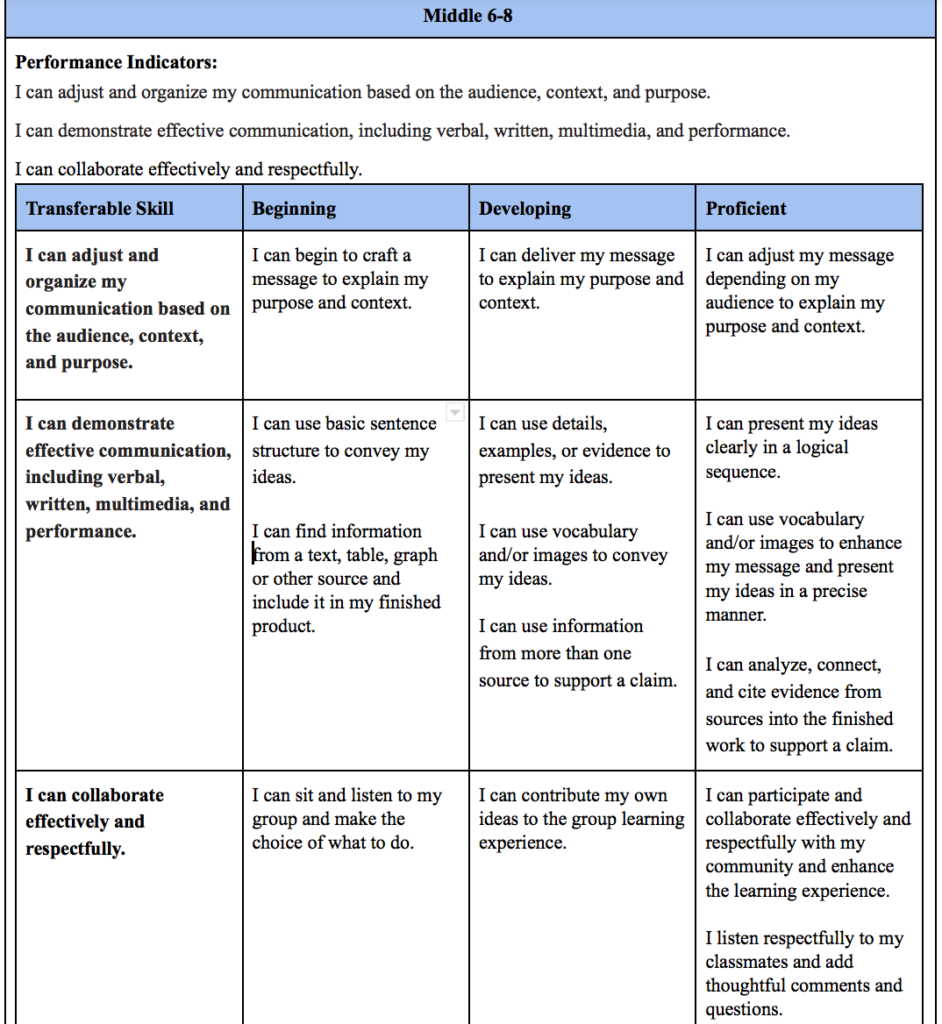
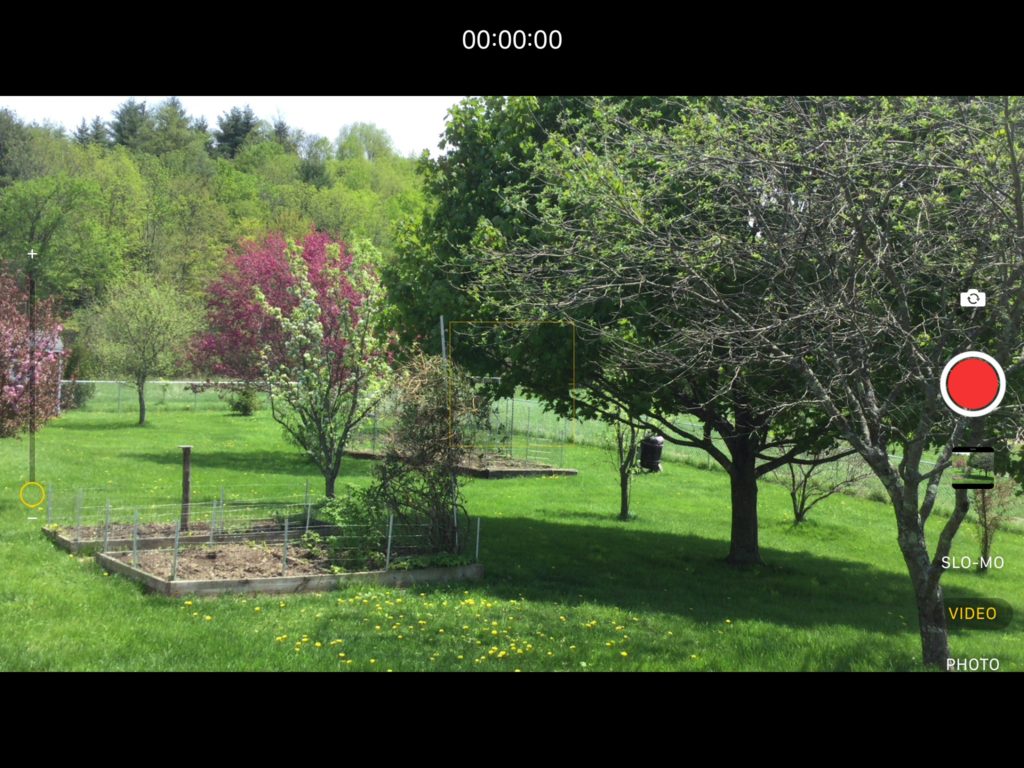
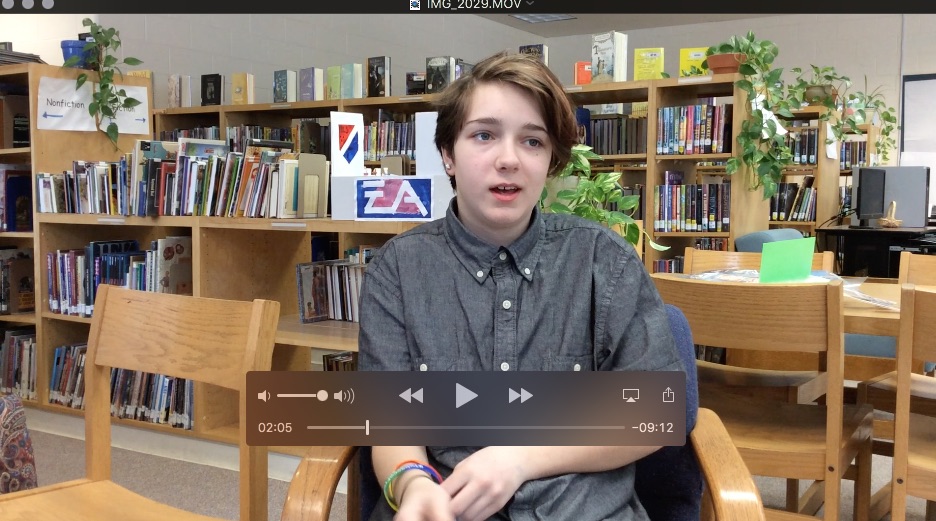
The ubiquity of the digital camera, whether mounted in smartphone, tablet or Chromebook, is getting everyone excited about making videos in the classroom. But it can be hard to translate the squealing, hand-flapping excitement of POWER into concrete, finished products. But making videos gets so much easier when you have two things: purpose, and structure.

Enter the cooking video. Now, at this point in time, the humble cooking video is a type of 21st Century lingua franca. Blame Alton Brown’s long-running Good Eats, or Tasty and their immaculate white-tiled backsplash, or simply admit that you’re off watching Tiny Kitchens videos on twitter when you should be paying attention in a staff meeting. Ahem.

So let’s jump in and get those spoons stirring. The purpose! A short, manageable student-produced video project that showcases student learning and builds video skills.

And the structure? A shot-by-shot approach. There is no need to re-invent the wheel, people. Steal from the best– Take inspiration from the wealth of cooking videos already existing out there. Note down what shots they use and be reassured that you and your students can get this done in two class periods. We teamed up with 6th graders at Currier Memorial School, in Danby VT, to test what it’s like to give students:

And you guys? THEY DID AMAZING.

Let’s tuck in. Starting with the gear:

We loaned Currier’s 6th graders the standard kit everyone here at the Tarrant Institute uses for shooting video: an iPad held in an iOgrapher case, with an external Rode Video MicPro, and either a tabletop or full-size tripod. They recorded their footage using the iOS native Camera app. Videos were edited in Apple iMovie on MacBooks. And there were three kits shared between 18 students.

The shot-by-shot approach:

Getting an iPad on a tripod is half the batter– uh, battle. After that, it’s a matter of writing a script and shooting some of the key components of the modern cooking video. You can go in order, or mix and match.

1. Introduce Your Host

A huge part of the appeal of cooking videos is that the default format centers on a friendly host, someone informed about food and cooking. When you watch a cooking video, you’re essentially welcoming that person into your home to show you how to make tasty food. And as video becomes more and more common for reflection, a key skill for students is getting comfortable on camera.

2. Currier’s innovation: The Ingredient Montage

Giving students the tools, the purpose and the structure and just hitting the deck almost nearly guarantees innovation of one form or another. In Currier’s case, they came up with the stop-motion ingredient montage as a key component of their videos, and it is simple but glorious.

3. The Action Shots: Pouring, Mixing, Whisking, Stirring, Adding, Filling and Checking Temperature

Overhead shots are your bread and butter of cooking videos! (Okay, I’ll stop.) But they actually do serve two functions in your video. One, they illustrate the step the host is describing, and two, they provide visual interest. That’s right: overhead shots are your cooking video B-roll!

4. Updates from the host

As your cooking is coming together, having the host continue to provide updates and small tips about the cooking process makes a watched pot much more interesting and informative.

Looking for a lesson plan?

Currier Memorial School educator Carrie Maus-Pugh designed this planning worksheet and checklist for students as they worked through their videos. BOOM.

Putting it all together

Amazing, right? We can smell what the Currier Kitchen is cooking and it is some glorious video work from the classroom.

The assessment rubric

Of course, as we all know with assessment, the proof is in the pudding. In this instance, the teacher was trying to integrate many concepts into this one cooking video; it combined geography, communication, poetry, science — so much good stuff!

Let’s say you just want to start with this video as a performance demonstrating clear and effective communication. Here’s a rubric that might support students and help them understand how to demonstrate proficiency:


Results! Delicious, delicious results.


And some surprises!

Sure cooking videos have their own narrative and format, that’s what the post’s about. But! Have you ever wanted to hear dumpling poetry? Good morning. Day: improved.

Have you tried shooting cooking videos with your students? How did it go? What did you learn?


16 tips for writing a great blog post

#10 will shock and appall you…

Here are 16 best practices we try to follow as writers on this blog. Many of them stem from two key factors: one, people online now have the attention span of lint, and two, search engine algorithms are really picky about what they deem “quality content”. And you want to keep people reading all about the amazing work going on in your schools!

So let’s jump right in with those guidelines.

1. Use short paragraphs and short sentences. As of 2015, when we’re online, we officially have less of an attention span than goldfish. Goldfish: nine seconds. Humans with multiple browser tabs open: 8.7 seconds.

2. Break up blocks of text with images or videos. It’s the attention span thing. You can reset your reader’s attention span by letting them off the hook on reading. Let them relax their eyes looking at something that’s not text, along with some restful white space.

tips for writing great blogposts
Photo credit: pixabay

3. White space is your friend. For both print and online reading, human eyes like white space. It’s a nice way to rest your eye muscles as you consume a large amount of text.

4. Use frequent subheadings.

Even if a reader’s skimming your post, at least they’re still reading.

5. Feel free to write Listicles. (We know, we know, but it’s a term recognized by the AP Stylebook.) They take less time to consume than actual articles and are super popular.

6. Bold key terms. A lot of your readers are skimming. We’re guessing right about now you yourself have started skimming to see what other items are included in this lovely reference guide. Don’t lie; we’re just excited you didn’t run off to check twitter. But bold terms make it possible to skim lists in a way that’s similar to what subheadings do for regular articles.

7. Don’t ever do the clickbait thing with lists. You know the thing I’m talking about: where you promise N things about a topic, and assure the reader that [thing N-minus-five] “will shock and appall you…” For one, search engines have totally caught onto this and it lowers your overall quality assessment as a resource. But for two, it’s gross.

8. End your blogpost with a question to spur reader reflection. This works especially well if you frame the question in such a way that you explicitly invite the reader into a conversation with you. Say you’ve just written a kick-butt post on 16 ways to incorporate live snails into content units. A great way to end that post might look like: “What are some ways you’ve used snails to liven up your content?” You’re inviting readers to tell you their stories.

9. Create a connection with your reader by addressing them directly in the second person. (“You’ve tried every trick in the book to keep students engaged. Well, here’s something you might not have tried: clowns.“)

10. Stick to one topic per blogpost, and feel free to go deep with it. Blogposts can quickly get out of hand if you try to address too many topics or ideas at once. Remember, you can always create a series of thematically linked blogposts.

11. Use active voice. Do not let yourself get used by passive voice.

12. Feel free to take and include screenshots. Rubrics and lesson plans are great for breaking up long screens full of text. Even a Google Doc makes a nice screenshot for teachers who would really love to get their hands on those rubrics and lesson plans.

The rule of thumb is that you can include screenshots of webpages as long as you reference where they’re from (or link back to them) and don’t take shots of paywall- or firewall-protected content.

13. Present your information independent of media type. Not everyone watches videos. Not everyone listens to audio pieces. The default internet stream is still text, with multimedia adding to the information presented in the text. So if you bring in a video, make sure you’re summarizing the relevant information in the video in your text. Not just:

“Watch the video above and notice what Katy says at the 3:10 mark. Powerful!”

For everyone who skips videos, the information is lost. In a case like this, you’d probably want to take the quote, type it up, and set it as a blockquote.

14. If you link to a document that’s not a webpage, indicate what it is in parentheses after the link. No one likes surprise downloads. Example: How Excited Are You For The New Year? An Exercise for Teams (.pdf)

Now, we realize you’re just skimming at this point, but if you take only two things from this page, it should be this:

15. Be nice

16. Practice accessibility

Nice means inclusive and respectful. The Sum of Us (.pdf) is a wonderful comprehensive guide to intersectional, respectful and inclusive language use. We all try to avoid language that negatively reference people’s ethnicities, genders, sexual orientations, economic backgrounds, physical ability and citizenship statuses. But we’re all carrying implicit, unpacked biases, so it’s useful to have touchstones and to just keep niceness present.

Accessible means that our readers should be able to access all our content regardless of physical ability. Writing for screen readers, transcribing audio and captioning videos is an equity issue. It’s also an issue when we’re choosing what types of examples, links and other media to include with our posts.

Accessibility also includes other less well-known strategies, such as:

  • Don’t use color to indicate semantic differences. (“Click the red button for flexible pathways, and the green button for flexible classrooms.”)
  • Include three or four words in your links. This way visitors using motion-support devices can easily move to your link.
  • Maximize the difference between text and background colors. Black text on a white background always works. White text on a black or dark background works for very short pieces of text. Pale pink text on a medium orange background is illegible to pretty much everyone.
  • Use alt-tags. Alt-tags are descriptions of images that are read out by screen readers. They’re fairly crucial.
  • Twitter has a built-in screen reader tool. So if you include a photo or image, you can write a quick description of it for screen readers. Here’s how to turn that feature on.

What other tips have you come across in creating quality blogposts?

How to make a mini-documentary

You’ve captured video of ALL THE THINGS. You’ve diligently trained your device on the action as some truly amazing work has gone down in your school. You’re excited to have a video you can share with families, with the school board and add to your PLP portfolio. And now you’re just sitting there, overwhelmed by it all. Wondering how in the world you’re going to get from an iPad full of footage, to finished. You’re wondering how to make a mini-documentary.

So… now what?

Now it’s time to get from footage… to finished.

Getting from raw footage to finished video can feel overwhelming. A lot of times what you’ve shot may make the best sense only within a larger context. But how are you going to tell your story?

Here is one way to make a small, manageable documentary-style film from your footage. There are tons of other ways you can try, including going to film school. But this way should only take you one afternoon.

Behold: “All Fried: Carolina Fish Camps”

All Fried: Carolina Fish Camps from Southern Foodways on Vimeo.

Watch this video. It’s six minutes long and it will make you ridiculously hungry for fried food. After you watch it, we’ll talk you through a way to make your own school-related version of it out of three things: a good interview, some listening skills and B-roll.

But first, the fish. Get to the watching.

Now, what did you just watch?

You watched a person — in this case a university professor — telling the story of a practice they like — eating at fish camps — and explaining why they like it.

That’s it. An interview punctuated by interesting visuals that helped explain the interview. And even if fish aren’t your deal, now you have one way to take a very big and overwhelming topic and make a compelling video about it.

And you’re going to do this by:

  1. Shooting an interview;
  2. Grabbing its soundbites;
  3. Adding B-roll, and
  4. Getting fancy.
Let’s jump in.

1. First, get a good interview

Decide who is be the best person to tell the story of your school project. That person is going to be the narrator of your documentary. 

Grab your gear and a partner

We use this setup to record most of our interviews:

We use it because it’s durable, relatively low-cost and super easy to use. There are tons of other setups out there, and whichever one you use is awesome. You’re doing absolutely amazing and none of us are going to Cannes tomorrow. Let’s ease into this.

Now, using the plain old Camera app, you’re going to find a quiet space, make sure your microphone is on, and record a simple but informative interview.

After you’ve made sure your microphone is on, you’re going to answer these five questions:

  • What is it you’re doing?
  • What’s the most challenging part about it?
  • What’s the most satisfying part about it?
  • What one piece of advice would you give to other teachers who’d like to try what you’re doing?
  • If you had to do this over, would you change anything?

For your interview, get comfy. This works super well in pairs, but sometimes you just have to go it solo. As long as you have your questions and make sure you’re in a quiet space (and your microphone is on) you can make it work.

Some notes about the interview environment:
  • Natural light from a window will make you look your stunning best. Or just go outside into the natural light. Go on. Shoo.
  • If you’re outside you likely will want to have a wind muff over your microphone.
  • Take a moment to make sure you’re not sitting under an AC vent or a fan, or next to an aquarium.
  • If you can, find a small room to record in for good audio, or, because we’re being realistic about school settings, have the interviewee face a bookshelf or a breeze block wall. Look for a space with a low ceiling. Those are the types of features that will help you get great audio.

Finally, make sure you see black bars at the top and bottom of your iPad screen:

And hit the record button.

Interviewee, please start by introducing yourself with your full name, what grade you’re in (or what subject you teach, possibly both — you know yourself best) and what school you’re connected with.

Now let’s step through our five questions.

If you’re the interviewer, give those questions some breathing room,  and don’t interrupt. If you feel yourself starting to “Mm-hm” or “Oh yeah!” realize that those will have to be edited out and, in the words of Her Own Sainted Self Tyra Banks, smize it out instead:

Smizing is the art of giving your interviewee encouragement to keep talking without actually making a sound. Less editing to do at the end.

2. Next, find your soundbites.

Now that you each have a good interview clip, you’re going to watch it back and figure out what your soundbites are. Those are the moments that make you nod your head, like, yes, that’s exactly what I want people to know about this project.

If you transfer your video to a laptop or desktop for editing, and open your interview clip in Quicktime, you’ll have that great timescale at the bottom of your clip:

how to make a mini-documentary


Grab something to write with. Now, as you watch your interview, when you hear a soundbite, jot down the approximate time it starts and finishes, and some words or a phrase that will remind you why you liked it so much. Get through the entire video, and find those soundbites.

Then, rank your soundbites.

Start by starring the ones you really love, as opposed to the ones that were just pretty good. Then assign them numbers, number 1 being the best, number 2 the second best etc etc.

Now it’s time to crack open iMovie

Create a new Project in iMovie, and import your interview file. Drop it onto the timeline so the beginning lines up with 0:00.

You have your list of soundbites with approximate timestamps. Say you want to create a soundbite from 0:10 through to 0:23. Move your playhead to 0:10. Wiggle it around a bit until you’re a little before where the soundbite begins. Once you have your playhead in place, click on the clip so it turns yellow, then press command-B, or go up to the Modify menu and choose “Split Clip”. You have just made your first edit.

Click on the bits of the video you don’t want, the bits outside your edit, and hit Delete. They get deleted from your timeline.

Finally, go to the File menu, choose Share… and then File…

You get:

how to make a mini-documentary


Repeat this process until you have a directory of soundbite files to work with.

Now, create a fresh iMovie Project and import them all.

You’re now going to arrange them on your timeline in a way that makes sense to you narratively. Don’t worry about your visuals yet, just figure out the story they’re trying to tell.

We try to put our favorite soundbite first in line, to draw people in. And we put our second-favorite soundbite last, as a coda to the whole story.

3. Add your B-roll to keep things moving

B-roll can consist of video clips or it can consist of still images you feel contribute to the points you made in your interview. In the Fish Camp story, you see a lot of B-roll of inside the restaurants, and the food being made, but when Dr. Criswell starts talking about how much he loves looking at the old menus, the visual cuts away to still images of menus. Totally awesome use of B-roll.

One of the most interesting things about the Fish Camp video is how much of the B-roll is tied to the nouns in Dr. Criswell’s story. When he says:

The fish camps were a place you could go, and feed your whole family, and not blow your paycheck (0:37-0:42)

(emphasis ours)

The B-roll that’s being shown on-screen at that time is of a group of similar-looking people, like a family, giving their order, which the waitress writes on the check.

When Dr. Criswell says:

And the portions were always generous. (0:46-0:47)

(emphasis is us again, we’re shameless)

The B-roll on screen is of a plate or portion of food. The amount of food on the plate is large, or generous.

When Dr. Criswell says:

The food at the fish camp had a direct relationship to the mill workers (1:20-1:23)

you see B-roll of mill workers.

So this is a great point at which to stop and ask: What are the nouns in your story, and do you have B-roll to illustrate them?

You can also shoot extra B-roll, if you’d like.

If you’re talking about how amazing it was to learn to tie your shoes, for example, take the media kit and film a partner tying their shoes. Maybe film over their shoulder or get down on their level with the tripod.

Two tips:

  1. Watch B-roll on fast-forward using the slider to control how fast it goes. You can get through a ton of footage just looking for interesting pieces of movement that catch the eye. Note the filenames and approximate timestamps. It’s easier to pull B-roll in as large chunks and fasten it in place, then adjust.
  2. Look back at your soundbites for interesting movement. If you got really heated about the chihuahua story and did a lot of gesturing with your hands or imitated its facial expressions, that’s really interesting to look at. Think about whether you really need to cut to B-roll there, or whether you telling the story is enough on its own.
Over in iMovie, start importing your B-roll into your project.

Command-I is your friend, people.

Once you have it in your project, add a piece to your timeline by selecting the clip and placing it above your existing timeline:

how to make a mini-documentary
(click to enlarge)


3.5 Stop and take stock of your work

Try this as a starting exercise: add in your top three soundbites, and some B-roll, then watch your story. Do you like what you’ve made? What’s missing? Did you get all your nouns? Do you need to shoot more B-roll?

Aaaaaaaaand breathe.

4. Get fancy with it: titles and background music

You didn’t think we were done, did you? P’shaw, we’re just getting started.

But as you go back and watch the Fish Fry (yes again; just one last time), ask yourself:

  • When does the title appear?
  • What does the title appear over?
  • Is there background music?
  • When does it come in? How long does it hang around for? And what word would you use to describe it as a mood?
And now for the obligatory piece about copyright

There are many fine pieces of music you can use for background to your documentary that are generously made available for Creative Commons use. Some good places to look are at the Creative Commons site itself, and over on Soundcloud, where you might find some lists that surprise you…

A huge shout out to the fine folks at the Southern Foodways Alliance, especially “All Fried” director Ava Lowrey for making this and other fine documentary pieces.

Here’s one we made earlier:


What’s your secret recipe for getting from footage to finished?

How to bake an inspiring kickoff video

Launching a new project cycle with inspiration from the last one

"Video in the Classroom"Organizing your realia — testimonials, storytelling and artifacts — from a round of projects can feel overwhelming. So much footage! So many interviews! ALL THE IDEAS!

Resist the freakout: here’s a recipe for pulling your footage together to inspire a new cycle of learning with lessons from the previous rounds.

Continue reading How to bake an inspiring kickoff video

How to tell your PBL story

Cornwall students think global, build local, share both

real world project-based learningLast year the most amazing thing happened: my students at the Cornwall School designed and built a playground. They dreamed, planned, proposed, revised, fundraised — deep breath — organized, built and managed.

But then they taught themselves how to share their story: with social media, and with a whole world of educators, so that other students might have the same experience.

Continue reading How to tell your PBL story

Machinima: using video games for storytelling

Be an X-Box Hero (with stars in your eyes)*

machinima in the classroomMeet machinima. The word’s a portmanteau of “machine” and “cinema”. It’s a unique form of storytelling that appears in video games, and students creating or mixing clips of video games to create new stories. And for educators, it presents a fabulous opportunity to channel students’ love of video games into producing personally relevant artifacts that demonstrate learning.

Machinima film festival, anyone?

Continue reading Machinima: using video games for storytelling

Beyond the audience of one

Why digital composition matters

why digital composition mattersI’d like you to think back to your days as a student. What kinds of writing did you do? Who read it? What made it important to you? And what made it important to the world?

If you’re like most people, you’re probably drawing a blank right now. Some of today’s students, though, can clearly articulate just how and why their writing is important. And we don’t mean writing as you might imagine, but rather digital composition:  digital stories, digital portfolios, documentary films, and of course, podcasts. For each of these, there is a real audience, one beyond the more typical audience of one, the teacher.

Continue reading Beyond the audience of one

3 types of videos for showcasing content areas

Structures & examples for student filmmakers

videos to showcase content area learning
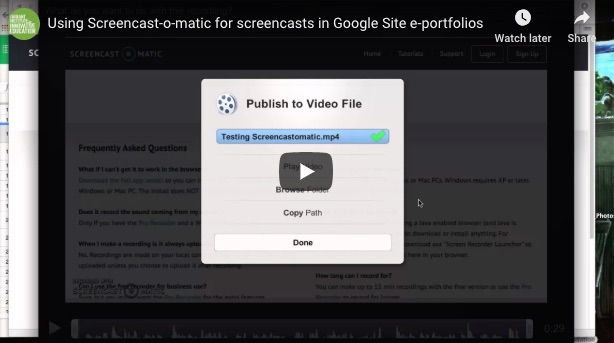
Many students love working with video. Students can create videos for any subject to show specifically what they’re learning, how they spend their time and to demonstrate proficiency. But it’s not always obvious how you, as an educator, can help students see the connection to  specific content areas.

Let’s take a look at some examples and think through how to scaffold students in sharing their work.

Continue reading 3 types of videos for showcasing content areas

How to save, edit and share video clips

Part 1: Finding and editing great videos with your students

how to save, edit and share video clipsFlipping your classroom? Found a great video about 18th century French military history that’s far too long for your students to stay focused on? Looking for great videos to share with students but stymied as to where to even start?

Worried that editing videos takes too much time and technical knowhow? Or possibly a different platform than the one you’re reading this blog entry on?

Let’s jam econo, y’all.

Continue reading How to save, edit and share video clips

How to app-smash Aurasma with Chatterpix

Give book characters a voice in reviews

How to app-smash Aurasma with Chatterpix A great way to bring book covers to life with augmented reality is through the AR app Aurasma. But for some students who are shy about actually appearing in videos for book reviews or trailers can app-smash the Chatterpix app to give voice to their favorite characters from books.

It’s a great way for students to think about elements of storytelling such as point-of-view, summation, showing vs. telling

Besides, it’s just fun!

Continue reading How to app-smash Aurasma with Chatterpix

Making the most of twitter in your classroom

making the most of twitter in your classroomTwitter’s not just a great way to build your PLN as an educator, it’s also a powerful tool to connect students with the world around them in very unique ways. But how can you make those connections authentic learning experiences?

Let’s look at making the most of twitter in your classroom.

Continue reading Making the most of twitter in your classroom

The power of transmedia storytelling

The power of transmedia storytellingaka The Bear Trap Story

When was the last time you saw your district superintendent leap over a bear trap?

No, school board meetings don’t count; that’s standard and part of the price of admission. But last week, 3rd grade students at Richmond Elementary School got to see Chittenden East Supervisory Union superintendent John Alberghini (that’s him over there in the tweet to the left), along with his sisters Debbie and Gina, brave an old and rusty bear trap left in the woods.

Now, I wasn’t there for the storytelling, but thanks to Tonya Darby’s tweet, I was alerted to what I think we can all agree were some epic shenanigans in the name of learning.

Then came the podcast.

Continue reading The power of transmedia storytelling

Chatterpix in the classroom

A new iOS app to blab about — literally!

Chatterpix is a free iOS app that allows you to put tiny mouths on your photos and give them silly voices. I am not making any of this up. Here’s one of a crab explaining facts about crustaceans:

Cool things about Chatterpix:

  1. Easy to use: choose a photo, draw a line for the mouth and record the message. Boom! Done.
  2. You don’t need to create an account to use it
  3. It’s free
  4. You’re limited to 30 seconds of audio, thus focusing students on the essential elements of storytelling.

There are so many ways you could use this in an educational setting:

  • have students animate a favorite photo of themselves with messages for a virtual exhibition — great for students with social anxiety issues around presenting;
  • record the morning school announcements;
  • create a map of a country and give each state it’s own voice;
  • have students record bios of famous historical figures (HT Matt Bergman)

“Bios” could actually be recorded for just about anything that will hold still long enough: moss, trees, VW Vanagons, abacuses, graham crackers, more moss, just of a different kind. There’s something about the ability to give silly voices (along with glasses, top hats, scarves and electric guitars) to items and get into the storytelling groove that’s incredibly appealing.

In fact, I can pretty much guarantee that if I’d gotten to write dialogues for animated chemistry molecules, I’d’ve passed Chem on the first try:

As an educator, you could also record yourself giving instructions for a lesson; modeling that bio of a famous historical figure; create a map of a significant place in a book your class is reading and APP-SMASH: photos + Chatterpix + other photos + Thinglink = APP-SMASH! YES!

Or you could just record dogs talking about which strand they’re taking at this year’s Code Camp:


What could you do with Chatterpix and your students?

Think outside the app: 3 outstanding examples of app-smashing

What-smash?

Despite sounding like a weird potato-fruit dish, app-smashing gets your students thinking less about apps and more about tasks. Hopefully with a minimum of actual smashing.

App-smashing is when you give students a specific assignment that can best be solved using more than one app. iPads4Teachers has a fantastic overview of app-smashing here.


Sounds good, but I need examples

You got ’em!

1. Video cards

Sylvia Duckworth, an elementary grades French teacher in Canada, created Mother’s Day video cards by taking screenshots with HaikuDeck, then importing those into iMovie to add voice and music. The result, you’ll agree, is simply smashing*!


2. Cultural anthropology

A group of students at the Cabot School in Vermont tackled a cultural anthropology project by using iPhones to record audio interviews they did with community members, editing the audio in GarageBand, then embedding the results in a map with Thinglink. Smash!


3. Show your work: demonstrate your solution to the problem

Susan Hennessey put together the above video as part of an assignment for the MOOC Creativity: Music to My Ears. She writes:

We were tasked with picking a problem, brainstorming 100 possible solutions for how music could help solve it (on a shared Google doc) and then selecting 2 or 3 to create a novel solution.  We were given 1-minute to present the problem and solution.  Since we were working with middle level students, we wanted to defer to what they liked about the 100 possibilities.  The two profiled by the Tellagamis are the top two selected.

Google Docs + Tellagamis + iMovie. A novel approach to the assignment, which, after all, is what app-smashing is all about.


What are some ways you’ve used app-smashing in your classroom?


*I’m actually obligated by law to make that pun at least once during this blogpost. True story.

Want to try out interactive fiction and games?

Want to try out writing interactive fiction and games with your students? Here are three tools that make it easy to get started.

In order of ease of use: YouTube

"Choose What Happens Next" is a series of videos that focus on digital citizenship choices for students. You navigate them like Choose Your Own Adventure books.
“Choose What Happens Next” is a series of videos that focus on digital citizenship choices for students. You navigate them like Choose Your Own Adventure books.

YouTube’s recently beefed up their suite of online editing tools (including a bank of royalty-free audio clips) and made them simpler to use. By embedding text-based links in video, you can tell an interactive video-based story.

YouTube Pros:

  • editing tools easy to use
  • doesn’t require a ton of writing, so caters to visual storytellers

YouTube Cons:

  • doesn’t require a ton of writing
  • YouTube may be blocked at your school (but that’s a WHOLE other blogpost)


Next up: StoryNexus

StoryNexus made a big splash when it was introduced via the way-too-addictive speculative steampunk game Fallen London. Players navigate through a virtual, text-based world in a Choose-Your-Own-Adventure manner, but with choose-a-card activities that interject an element of chance into the proceedings.

Winterstrike is a post-apocalyptic game of chance, built on the StoryNexus platform.

StoryNexus Pros:

  • Easy and compelling to get really into world-building
  • Lots of students already on there with games; peers, feedback, ideas
  • Library of GoogleDocs manuals and crowd-sourced how-to’s
  • Easy to add images and audio to text
  • Lots and lots of writing to do, boosts world-building

StoryNexus Cons:

  • Students need to sign up for accounts
  • Hard to build a game in one class period
  • Lots and lots of writing to do


And then there’s Twine

(“Do it for the Twine! I ain’t gonna do–“)

Ahem.

Ashton Raze's Twine game,"Don't Read the Comments", combining digital citizenship with Twin Peaks references.
Ashton Raze’s Twine game,”Don’t Read the Comments”, combining digital citizenship with Twin Peaks references.

Twine‘s a challenging little piece of software that takes a step closer to computer programming logic while you build your games. It’s a stellar introduction to the concept of global vs. local variables, for instance*.

Twine games are browser-based, which means you can practice your HTML and CSS skills while you sort out what kind of tea the yeti usually drinks. Yes, I made that game**. It was not entirely easy but the things that were complicated didn’t make me tear my hair out. They were fun to figure out, and as a fan of interactive fiction, I enjoy the pace of the finished product.

 Twine Pros:

  • The ability to embed videos, images and audio make this a truly multimedia storytelling platform
  • Lets students bone up on HTML and CSS while they write

Twine Cons:

  • Steeper learning curve than the other two

Here are some lovely related links for you to disappear down the rabbithole of your choice:

Do you:

Let the games… begin!


*If that sentence didn’t make sense to you, get in touch. Let’s get you a seat at this summer’s Code Camp.

**And yes, it’s not finished, because I also have to write many fine blog posts each week, such as this one. You will cope.

Why is everyone doin’ it for the Vine?

favorite

Vine is a tool where users can craft looping six-second videos for sharing globally, and other users can up-vote them, follow favored Vine-creators (some of whom have one million+ followers) and comment. It’s available for the Android, iOS and Windows platforms, and despite the nominal age-17 requirement for the platform, it’s more than likely that students in your class are more than likely Vining.

And what they’re making are awesome. Here’s why:

1. Authentic student voice

Want to know what students really think about school? Get on Vine and follow the #school hashtag.


jammie


schoolnetwork

artesia

They aren’t Vining for a grade or for any school project. This is what students really think about school. It’s not always pretty, and it’s definitely not always complimentary towards the schools in question, but what it is is startlingly honest.

And 2., this is a really fascinating digital storytelling medium.

teachers

brandon2

Think about all the skills that come into play in figuring out how to tell a story in six seconds.


finals

But it’s not just students who are using Vine.

At Orchard School in South Burlington, librarian/rock-star Donna McDonald is using Vine with her students to create a series of six-second book reviews to share for the #MockCaldecott awards. First of all, they’re epic, and second, they’re each only six seconds long, so you can easily justify watching every last one. Such as this one:

bluebird

And this:

flora2

(Seriously, just go follow @OrchardVT on twitter. They share fantastic work and those #MockCaldecott Vines are this close >< to becoming their own meme.)

All of which brings up two questions: Do you Vine? And do you know what your students are Vining?